Mastering Pomegranate Seeds: Cleaning & Germination Secrets
The journey of growing a magnificent pomegranate tree from a humble seed is a deeply rewarding endeavor, a testament to patience and the wonders of nature. Imagine plucking your own ruby-red fruits from a tree you nurtured from scratch! While it requires a long-term commitment, the initial steps — particularly cleaning and preparing the seeds — are paramount to success. This comprehensive guide will unlock the secrets to effectively preparing your pomegranate seeds, focusing on how to remove the essential "pomegranate seed cover" and optimize them for germination.
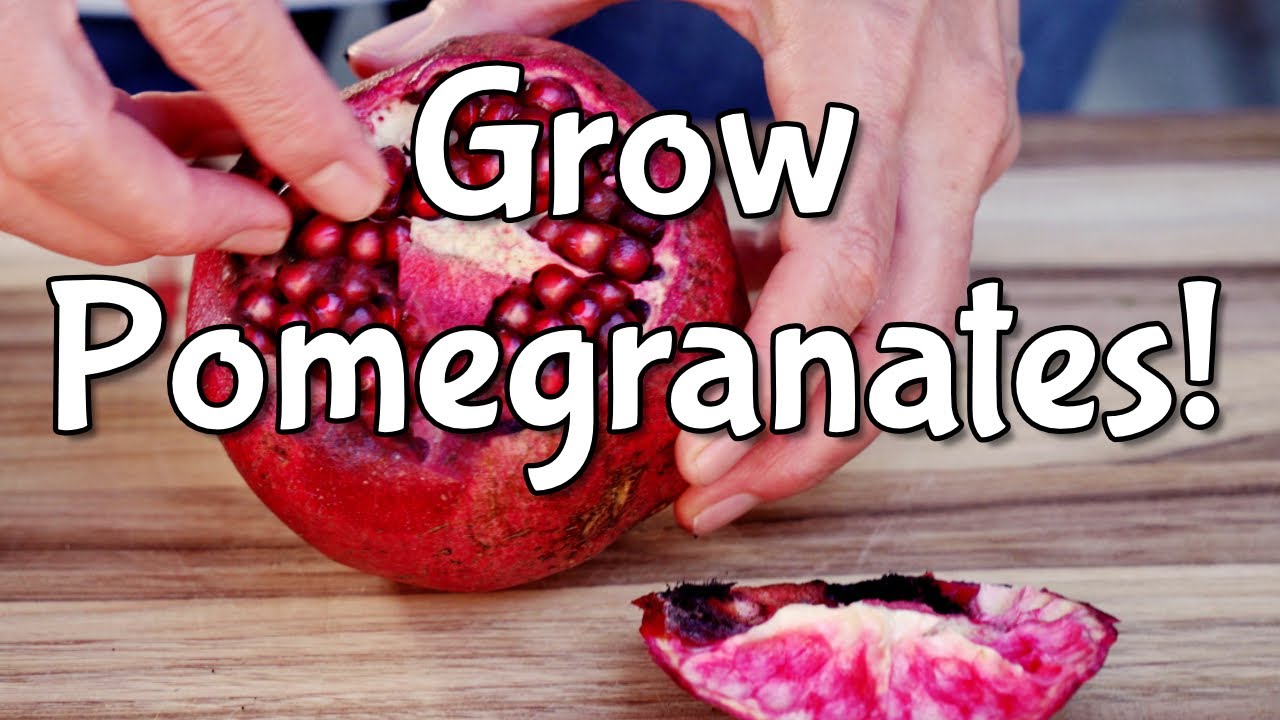
Understanding the Pomegranate Seed and Its Fleshy "Cover"
Before delving into the cleaning process, it's crucial to understand what you're working with. A pomegranate fruit is packed with hundreds of arils – those glistening, juicy, and delicious sacs that are so characteristic of the fruit. Each aril encapsulates a small, angular, off-white seed. This fleshy aril effectively acts as the *pomegranate seed cover* that needs to be removed for successful germination.
Technically, an aril is an exterior covering or appendage of some seeds, developing after fertilization as an outgrowth from the ovule stalk. While you might enjoy popping a whole aril into your mouth, for germination purposes, this vibrant, sugary casing poses a significant challenge. If left on the seed, the sweet, moist flesh can quickly lead to mold and rot once planted, effectively suffocating the embryonic plant before it even has a chance to sprout. The goal, therefore, is to meticulously strip away every trace of this beautiful but detrimental *pomegranate seed cover*, revealing the small, hard, true seed underneath. This true seed, with its characteristic pointed end where the root will eventually emerge, is what you'll plant to start your tree.
The Essential First Step: Selecting Your Pomegranate Fruit
Your journey to a thriving pomegranate tree begins not in the garden, but in the produce aisle of your local grocery store. Yes, you can absolutely grow a beautiful and potentially productive pomegranate tree directly from the seeds of a store-bought fruit! This fascinating process offers immense satisfaction, transforming a culinary delight into a living, growing landscape feature.
When selecting a pomegranate for its seeds, quality is key. Look for a fruit that is:
- Large and Ripe: Generally, larger fruits tend to have larger, more robust seeds. Ripe pomegranates will have a deep, uniform color (often ruby red, but can vary by cultivar) and feel heavy for their size, indicating a high juice content within the arils.
- Firm to the Touch: Avoid fruits that are soft, bruised, or show signs of rot, as these may contain non-viable or diseased seeds. A healthy, firm fruit is a good indicator of healthy seeds.
- Unblemished Skin: While minor cosmetic flaws won't affect the seeds, avoid pomegranates with large cracks or excessive discoloration.
It's important to remember that when you grow a plant from a seed, especially from a hybrid variety, you are creating a new, unique genetic individual. This means your new tree may not be an exact clone of its parent fruit; the resulting fruit might have slight variations in size, color, or taste. However, it will undoubtedly be a true pomegranate tree (_Punica granatum_) and, with proper care, will produce delicious fruit for decades. For more insights on this genetic journey, consider exploring
From Store Fruit to Tree: Cultivating Pomegranates From Seed.
Mastering the Art of Pomegranate Seed Cleaning
This is perhaps the most critical juncture in preparing your seeds for germination. Improperly cleaned seeds are highly susceptible to mold and rot, which can quickly derail your efforts. The objective is to thoroughly remove all traces of the red, fleshy pulp (the aril) without causing any damage to the hard inner seed. Here are a few field-tested methods for meticulously cleaning your *pomegranate seed cover*:
- The Napkin/Paper Towel Press:
- Extract the arils from the pomegranate, separating them from any bitter white pith.
- Take a small handful of arils and wrap them snugly in a clean napkin or paper towel.
- Gently but firmly press and rub the arils within the paper. The friction and pressure will help strip away the flesh, absorbing the juice into the paper.
- Unwrap and inspect the seeds. Repeat the process with fresh paper if necessary until the seeds are mostly clean.
- The "No Waste" Mouth Method:
- This method is simple and efficient. Pop a handful of arils into your mouth.
- Gently suck off the juice and pulp, enjoying the delicious flavor. Do *not* chew the seeds, as this can damage them.
- Once the seeds feel clean and hard, spit them onto a paper towel.
- The Mesh Screen Rinse:
- Place a handful of arils in a fine-mesh sieve or colander.
- Hold the sieve under cool, running water.
- Gently rub the arils against the mesh screen with your fingers. The water will help wash away the pulp as it separates from the seeds.
- Continue rinsing and rubbing until the seeds are free of any sticky residue.
After employing any of these methods, rinse your collection of clean seeds thoroughly under cool water. This step is vital for removing any lingering sugars that could still attract mold. Spread the clean seeds on a dry paper towel and allow them to air dry for a few hours. They don't need to be bone-dry, but exposing them to air reduces the risk of mold developing after planting. You want them to feel hard and clean, not sticky or moist. For more detailed instructions on cleaning and the subsequent planting steps, refer to
Grow Pomegranates From Seed: Your Guide to Cleaning & Planting.
Preparing for Germination: Drying, Storage, and Stratification
Once your pomegranate seeds are thoroughly cleaned and air-dried for a few hours, you have a couple of options for proceeding.
Drying for Short-Term Storage
While immediate planting generally yields the best germination rates, you might need to store seeds for a short period. For this, it's beneficial to let the seeds air dry completely for a few days in a cool, dark place. They should feel hard and completely dry to the touch, free from any stickiness. Properly dried seeds can be stored in a paper envelope or a small, breathable container in the refrigerator for a few months. However, remember that seed viability can decrease over time, so the sooner you plant, the better your chances. Avoid letting bare seeds dry out for too long, as this can significantly reduce their viability.
The Question of Cold Stratification
A common query among aspiring pomegranate growers is whether cold stratification is necessary. Cold stratification is a process that simulates winter conditions, typically involving exposing seeds to a period of cold, moist temperatures. This often helps break seed dormancy in many plant species, mimicking the natural cycle they would experience outdoors.
For pomegranate seeds, the answer is generally "no," it's not strictly necessary. Pomegranates originate from regions with milder winters and often don't have a deep dormancy requirement that demands cold stratification. Many growers achieve excellent germination rates by simply planting freshly cleaned seeds without any pre-treatment.
However, some gardeners find that a brief period of cold stratification (e.g., placing cleaned, slightly moist seeds in a sealed plastic bag in the refrigerator for 2-4 weeks) can sometimes encourage more uniform or slightly faster germination. If you choose to stratify, ensure the seeds remain slightly moist but not waterlogged to prevent rot. Ultimately, while it can "help" in some cases by mimicking natural conditions, it's not a mandatory step for _Punica granatum_ and should be considered optional.
Nurturing Your Future Pomegranate Tree
With your seeds perfectly cleaned and prepared, you're ready to plant! Select a well-draining potting mix, ideally one formulated for fruits or general all-purpose use. Plant your seeds about ½ inch deep in small pots or seed trays. Provide them with consistent moisture (but not soggy soil) and plenty of warmth (ideally around 70-80°F or 21-27°C). A sunny windowsill or under grow lights can provide the necessary light once sprouts emerge.
Patience is perhaps the most crucial tool in your gardening arsenal when growing pomegranates from seed. Germination can take anywhere from a few weeks to several months. Once your seedlings are established and strong enough, they can be transplanted into larger pots and eventually outdoors (if your climate allows). While you'll enjoy watching your plant grow, understand that it typically takes several years (3-5 years or even longer) for a seed-grown pomegranate tree to mature enough to produce its first flowers and fruit. But the long-term reward — a healthy, fruit-bearing tree that could grace your landscape for decades — makes every step of this journey incredibly worthwhile.
Conclusion
Embarking on the adventure of growing a pomegranate from seed is a rewarding experience that connects you deeply with nature's cycle. By understanding the nature of the *pomegranate seed cover* (the aril) and mastering its removal, you lay a strong foundation for successful germination. From selecting the perfect fruit to meticulous cleaning and patient nurturing, each step brings you closer to cultivating your very own pomegranate tree. Embrace the process, relish the journey, and prepare to be amazed by the resilience and beauty of this ancient fruit.